How to Take Professional Photos with Your Phone

Updated: 2019 - Cheatsheet no longer available.
As you all know, Instagram revolves around high quality and well thought out photos. The biggest downfall? The cost of expensive gear! Lucky for us, smart phone camera abilities are improving with each new phone release making it easier than ever to take professional photos. Now days, certain phone models have higher mega pixels than your average point and shoot camera!
Some of you reading this, aren't photographers or maybe you are just getting started and aren't ready to invest in a camera. These easy to follow tips will allow you to take professional photos with your phone. You might even surprise yourself!
How to take professional photos with your phone
Use Gridlines
Gridlines are a great way to easily find balance in every shot. Gridlines are a series of 4 lines dividing the shot into 9 sections that show up on the screen as you take your picture. This is also known as the “rule of thirds” in photography (See example below). When taking a photograph, according to this rule, place the subjects of interest on these lines.
IPHONE USERS: To turn on the Camera grid lines, open the Settings and then scroll down to "Photos & Camera." Tap on "Photos & Camera" to access the settings and scroll down to "Grid." Tap to toggle on and off.
ANDROID USERS*: Open camera, tap settings in the upper left corner and scroll down to gridlines. Tap to toggle on and off
* May vary based on phone model.

Place your areas of interest on the lines to create a path for the viewer's eyes to follow.

Sometimes we can break this rule and add visual interest by placing our subject in the center. This is usually a "no-no" in school but it's become popular with Instagram photographers.
Related: Basics of Photography That you must Know to Be Successful
Try Apple’s Microsite “How to Shoot on iPhone”
You really can't beat these incredible short videos. Even if you don’t have an iPhone 7, or an iPhone for that matter, this website is full of useful tips that will make you a better photographer. I love that the videos are digestible and fun to watch. The tips range from technical skills to simple photography tips such as "How to shoot a Sunset Silhouette". You can choose to experiment with different techniques or stick to the classics.
Experiment with Perspectives and Angles
Different perspectives and angles make a photo more interesting to look at. In photography, a different perspective can turn a basic everyday scene, into a work of art, even if this is taken on a phone. Try taking pictures from unexpected perspectives to create more depth.

Low perspective to create a sense of depth.

Forced perspective - an optical illusion created by making objects appear larger or smaller than they actually are. Photo Credit: Kyle Huber
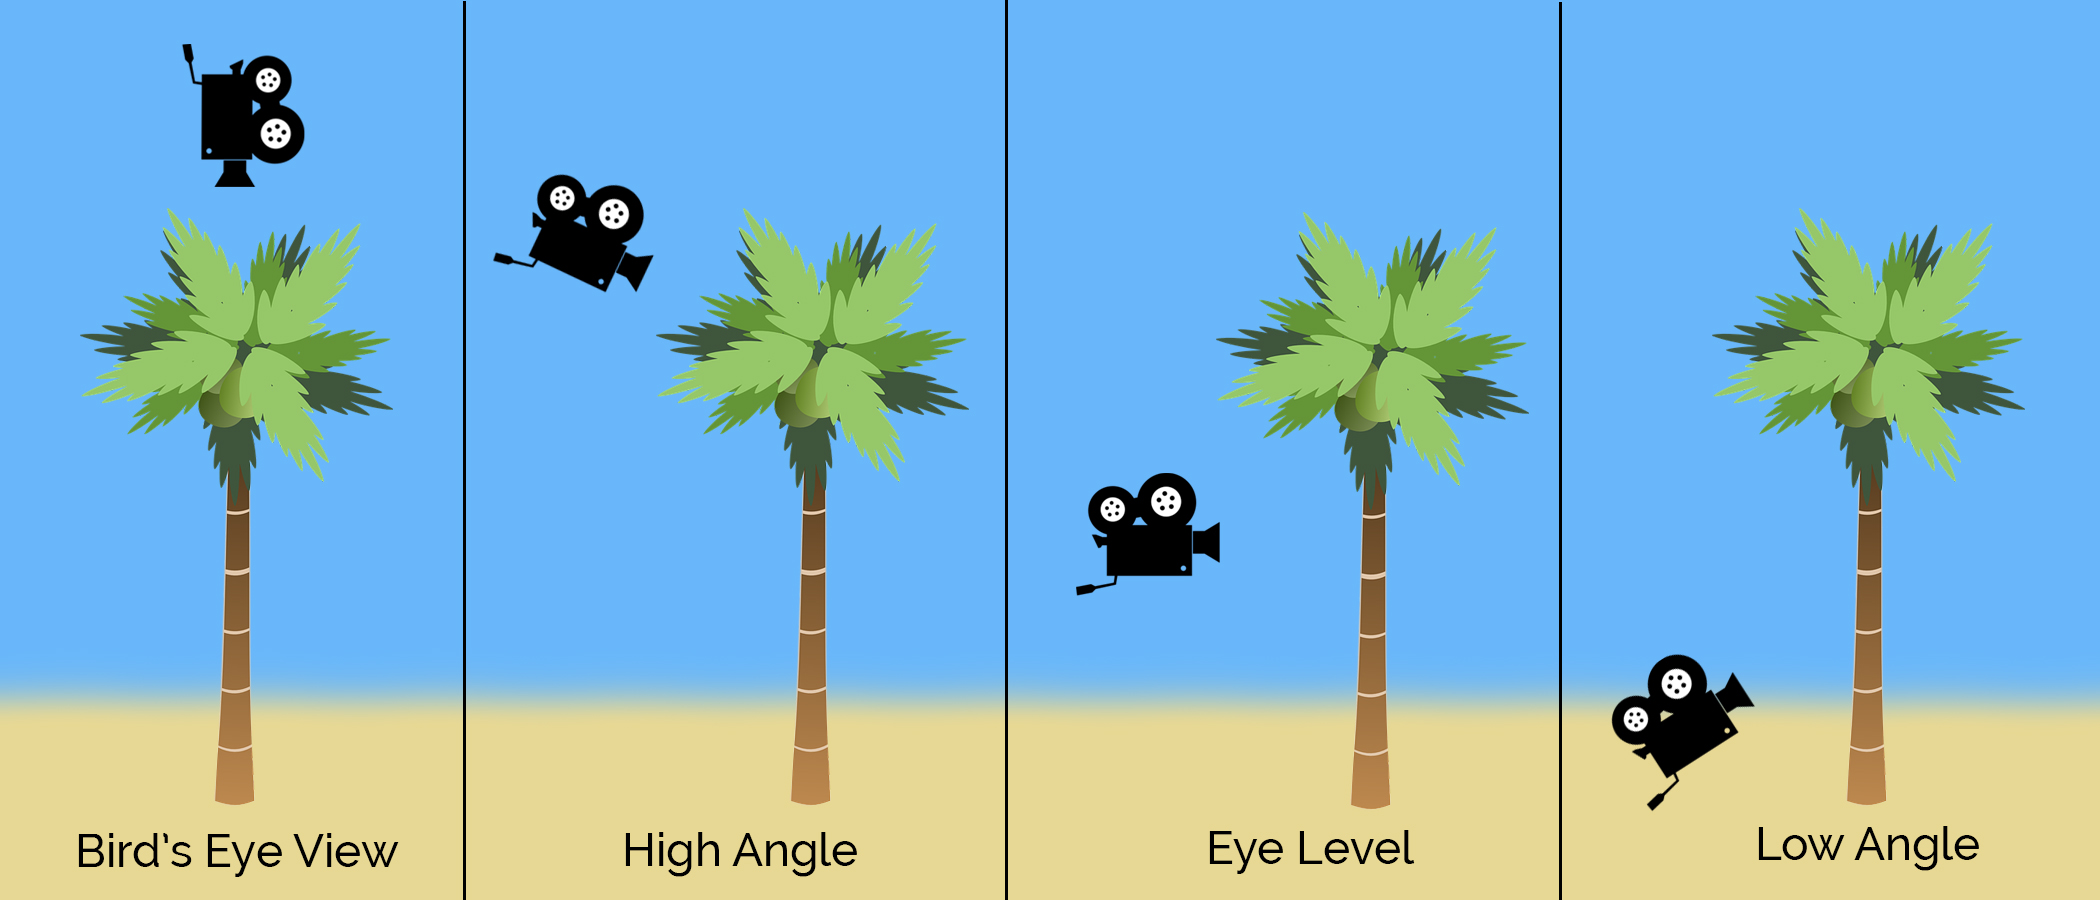
Angles: Bird's Eye View - directly overhead, high angle - above the subject, eye level - neutral, low angle- below the subject.
PRO TIP: Shooting from a lower angle will make the subject appear bigger and powerful where as a high angle will make the subject appear smaller.
Shoot in Natural Light or Fake it!
We all despise that nasty yellow light that seems murky and grainy on our phones. This usually occurs in low-light situations or when were shooting indoors. Example, restaurants, offices, parties, etc. There are a few ways to fix this.
Shoot in natural light - take your subject outside or use a large window in your house. Not an option? Fake it with lights like these or by switching out your bulbs.
Edit your photos on your computer or in an app and use the temperature or color option to cool down the image. (Slide the temperature to the blue side)
Low Light Situations
There are times when we want a low-light or night image but our phones won't behave. Here are some ways to fix that.
Keep the camera steady - no tripod? try using your surrounds (a book, table, sidewalk etc). Use your earbuds and click the volume button to trigger the shutter or set your phone on a timer.
Look for small areas of light that will light up your subject while keeping the background dark.
Try using a long exposure app such as Cortex Cam, NightCap Pro or Average Camera Pro or play with your HDR settings in your phone


Keep Your photos clean and simple
Professional phone photos tend to look best if they are clean and simple. Keep the background clutter free and pay attention to small details or anything that should be removed from the frame. It's easy to say "I'll photoshop that later" - something that I am very guilty of, but you'll be grateful that you took care of it on the scene instead of wasting time later on.
Remember, you can always crop your images to get rid of unwanted, excess areas. Sometimes tighter crop looks a lot better than the whole scene.
Try Image Editing Apps Instead of Filters
Apps are always better than basic Instagram filters. I recommend these apps. Try experimenting with editing styles until you find your own unique aesthetic that people will recognize by a single photo.
Big Mistake: Avoid over editing - this can easily happen with phone photos due to the small size and grain. Adding too many filters or edits can actually make this worst so be mindful of this. Less is always more!